The Installation in Plain Terms
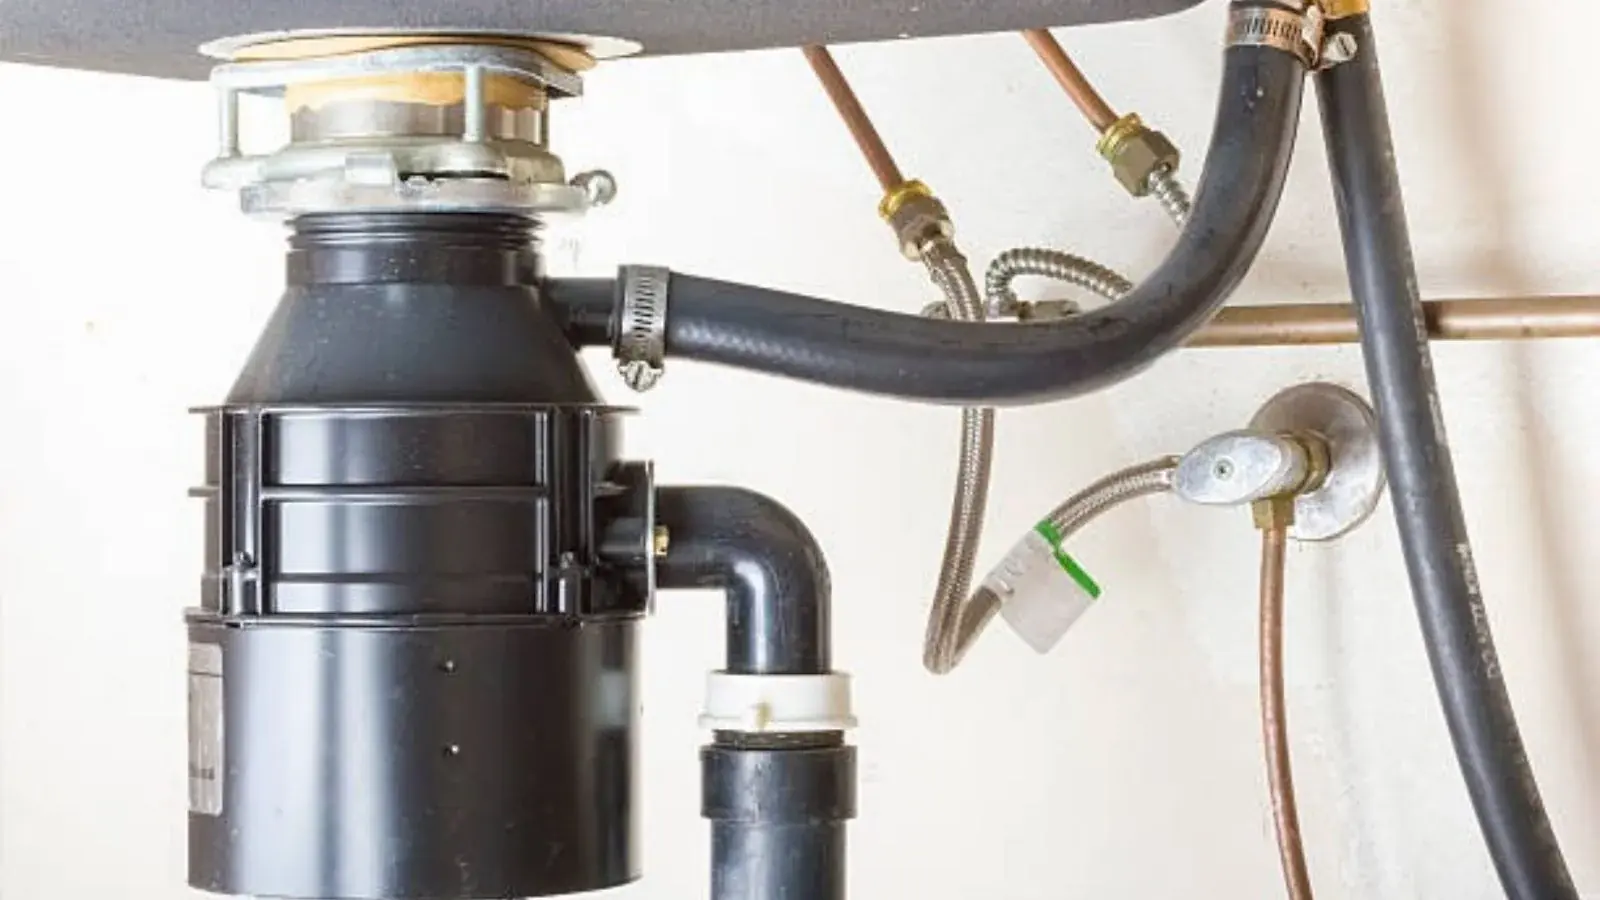
A disposal hangs from the sink drain opening. A mounting ring and flange clamp it to the sink, the discharge port connects to the drain trap, and the dishwasher hose connects to a small inlet on the side. Power comes from a switch on the wall or the countertop.
A replacement of a like unit in the same spot is simpler than a first-time install. A first-time install adds new wiring, a new switch or outlet and often a modified drain, and that is where licensed help matters most.
Plan on a full afternoon the first time. Rushing leads to the two most common failures, which are a slow drip at the flange and a loose drain connection.
What You Need on the Counter First
Gather everything before you shut off the power. Stopping halfway with a sink full of open pipe is a poor way to find a missing part.
- A disposal rated for your sink and household use, plus the mounting kit from the box.
- Plumber's putty, a new trap or discharge tube kit, and the correct adapter if your sink is stainless.
- A power cord kit or a plan for a hardwired connection, with the right wire connectors.
- A bucket, rags, a flashlight, slip-joint pliers, a screwdriver and a hacksaw for trimming pipe.
- A way to test the circuit, such as a non-contact voltage tester.
- A clear space under the sink and a helper to hold the unit during the final lift.
If your sink drain also serves a dishwasher, remove the knockout plug inside the dishwasher port with a screwdriver before you attach the hose. Forgetting this is a classic cause of a dishwasher that will not drain.
Disposal humming or jammed?
Cut power at the switch and breaker first, then call. We will tell you whether a reset is safe or a repair is needed.
Electrical and Drain Safety Before You Touch Anything
Water and power sit very close together under a kitchen sink. Treat the electrical step as the most serious part of the job.
- Switch off the circuit at the breaker panel, not just at the wall switch.
- Confirm the wires are dead with a voltage tester before you touch them.
- Never wire or test a disposal with wet hands or while standing in water.
- If the circuit is shared with a dishwasher, label the breaker so nobody turns it back on while you work.
- If your sink area has no grounded outlet, or you are not sure how the wiring is run, stop and call a licensed professional.
- If you ever smell gas near the kitchen, leave the building and call the gas utility or 911 from outside before you do anything else.
Never put your hand into a disposal to check or clear it, even when it is off. Use tongs or pliers, and cut power at the breaker first.
Five Stages of a Disposal Installation
These stages assume a standard kitchen sink with a flange opening. Always follow the instructions in your unit's box where they differ.
Remove the old drain or disposal
Place a bucket under the trap, loosen the slip nuts and take off the old tailpiece or unit. Scrape old putty from the sink opening and clean it.
Seat the sink flange
Roll plumber's putty into a rope, press it under the new flange and set it in the opening. Fit the gasket, backup ring and mounting ring under the sink and tighten evenly.
Prepare and hang the unit
Wire or plug in the power connection first, with the power off, then lift the disposal onto the mounting ring and twist to lock it. A helper makes this easier.
Connect the discharge and dishwasher hose
Attach the discharge elbow and gasket, then fit the trap so it slopes slightly toward the wall drain. Clamp the dishwasher hose to the inlet.
Test for leaks and noise
Turn the power on, run cold water and switch the unit on. Check every joint with dry paper towel, run the dishwasher cycle and look again.
Do It Yourself or Hire a Pro
Both paths are reasonable depending on the job. This table shows where the split usually falls.
| Situation | DIY is reasonable | Hire a licensed pro |
|---|---|---|
| Replacing a unit in the same spot. | Yes, with a plug-in cord and matching mounts. | If the old unit is corroded or the power is hardwired. |
| First disposal in a sink that never had one. | Rarely | New wiring, switch and drain changes are needed. |
| Double bowl sink. | Possible with an extra drain kit. | If the drain heights do not line up. |
| Dishwasher connection | Simple when the hose is intact. | If the air gap or high loop is missing. |
| Old pipes or slow drains downstream. | No | Clear the line first, then install. |
| Any doubt about electrical safety. | No | Always call a licensed electrician or plumber. |
New Jersey allows plumbing work only by a licensed master plumber or authorized contractor. Homeowners can look up a licence on the state verification site before hiring.
Where Installations Go Wrong
A leak at the flange almost always means too little putty or uneven tightening on the mounting screws. A drip at the trap means the slip nuts or gaskets are not seated. Fix these before you put anything in the sink, because a slow drip can ruin a cabinet floor.
A disposal that hums and does not turn is usually jammed, not broken. Cut power at the breaker, then turn the shaft with the hex key that comes with the unit. Press the reset button on the bottom after the unit cools.
A disposal that runs but drains slowly points to a blockage past the trap. Grinding does not fix a clogged line. Our drain cleaning crew can clear the branch before you blame the new unit.
What Hawthorne Kitchens Mean for a New Disposal
The median Hawthorne home was built in 1953, and about 60 percent of the borough's housing units date before 1960. Kitchens in older houses often have galvanized or cast iron drain pipe behind the cabinet. That pipe may be rough or narrowed, and a new disposal will load it with ground food. Ask a plumber to look at the branch line before you buy.
About one in four Hawthorne housing units sits in a two-unit building, where two kitchens may share a building drain. If your neighbor above or below you shares a stack, a food clog can show up in their sink first. Tell them before you start so nobody is surprised by a gurgle.
The borough Building Department at 445 Lafayette Avenue does not require a permit for a faucet or valve replacement when piping is not rearranged. A disposal that needs new drain piping or new wiring is a different matter, so call the department or ask your plumber first. Hard water at roughly 236 to 278 ppm at several borough plants can also leave scale on the disposal's inner parts, so run cold water before and after each use.
Using a Disposal So It Lasts
Run a strong stream of cold water before, during and for several seconds after grinding. Cold water keeps fats solid so they break up and flow, while hot water melts grease that later hardens in the pipe.
Skip grease, coffee grounds in bulk, bones, pasta, rice, potato peels and fibrous scraps such as celery or corn husks. These form a paste or a mat that a disposal cannot move.
If you want a plumber to handle the whole job, see our garbage disposal service. We also help neighbors in Wyckoff who call for the same kitchen jobs.
Common Questions
Many homeowners replace an existing unit successfully, especially when the new one fits the same mounts and plugs into an outlet. A first-time install, new wiring or changes to the drain are better left to a licensed pro.
If a plug-in outlet already exists under the sink and is on a protected circuit, you may not. If the unit must be hardwired or a new circuit is needed, a licensed electrician or a plumber with the right licence should do it. Ask the Building Department when in doubt.
Yes. Leave the dishwasher inlet plugged. The dishwasher port has a knockout plug that only needs to be removed when a hose is attached.
A leak from the underside is often the seal in the disposal itself and means the unit is damaged. Leaks higher up usually come from the flange or the drain gasket. Dry everything, run water and watch to see where the first drip forms.
Grind a few ice cubes, then run cold water for a minute. A halved lemon or a spoonful of baking soda can freshen the chamber. A persistent smell usually means debris is trapped under the splash guard or in the trap.
The borough's permit list names furnaces, boilers, water heaters, softeners and added bathrooms, and notes that faucet or valve replacement does not need a permit if piping is not rearranged. A like-for-like disposal swap is likely fine. A job that moves drain piping or adds wiring should be checked with the Building Department first.
Local figures on this page come from the Hawthorne Water Department's 2026 Water Quality Report and U.S. Census Bureau American Community Survey estimates. Check current numbers with those sources before you rely on one.